Final Reflection!

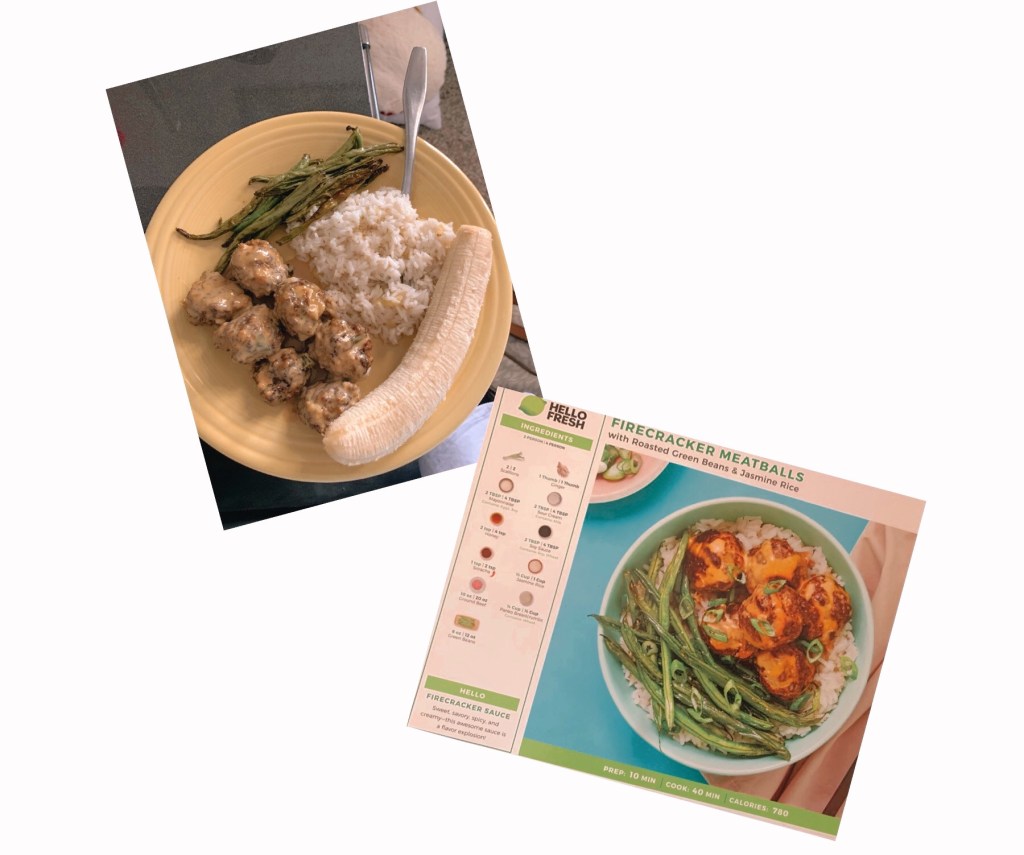
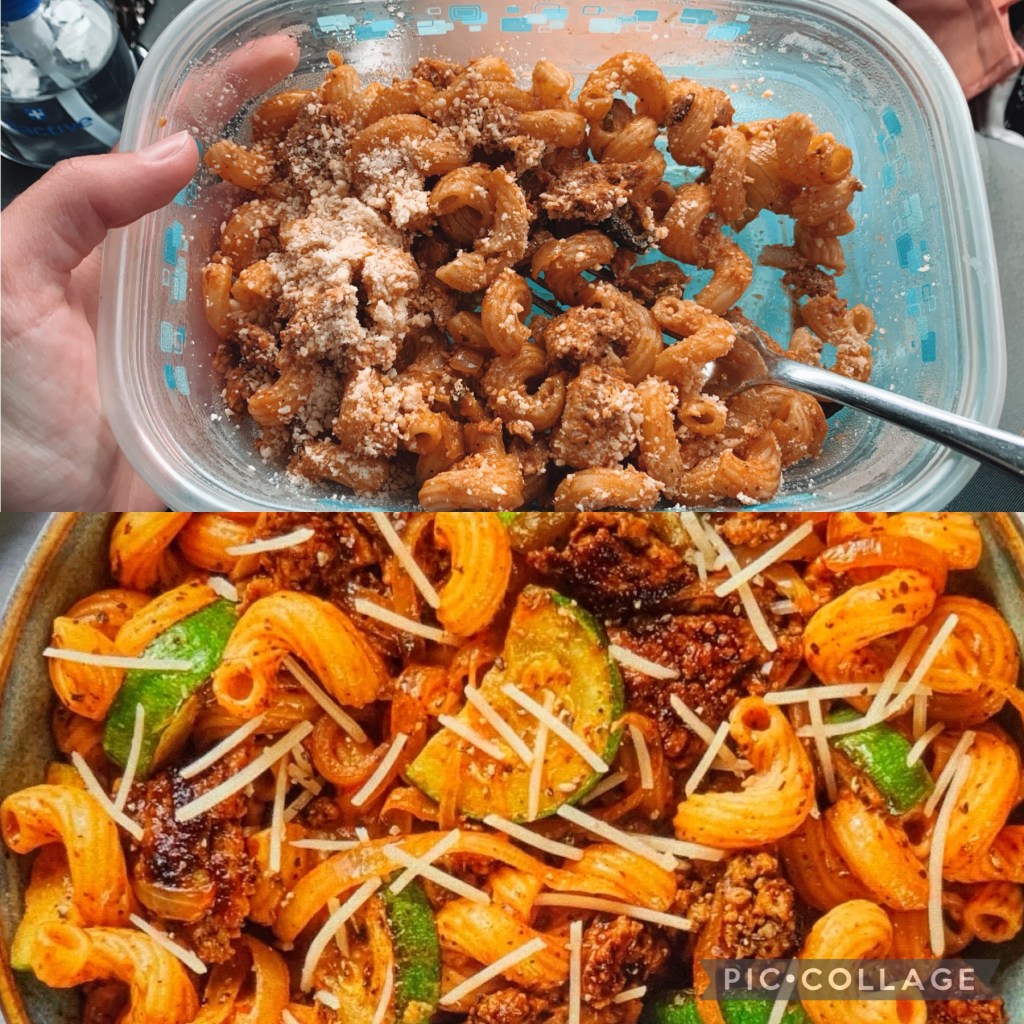
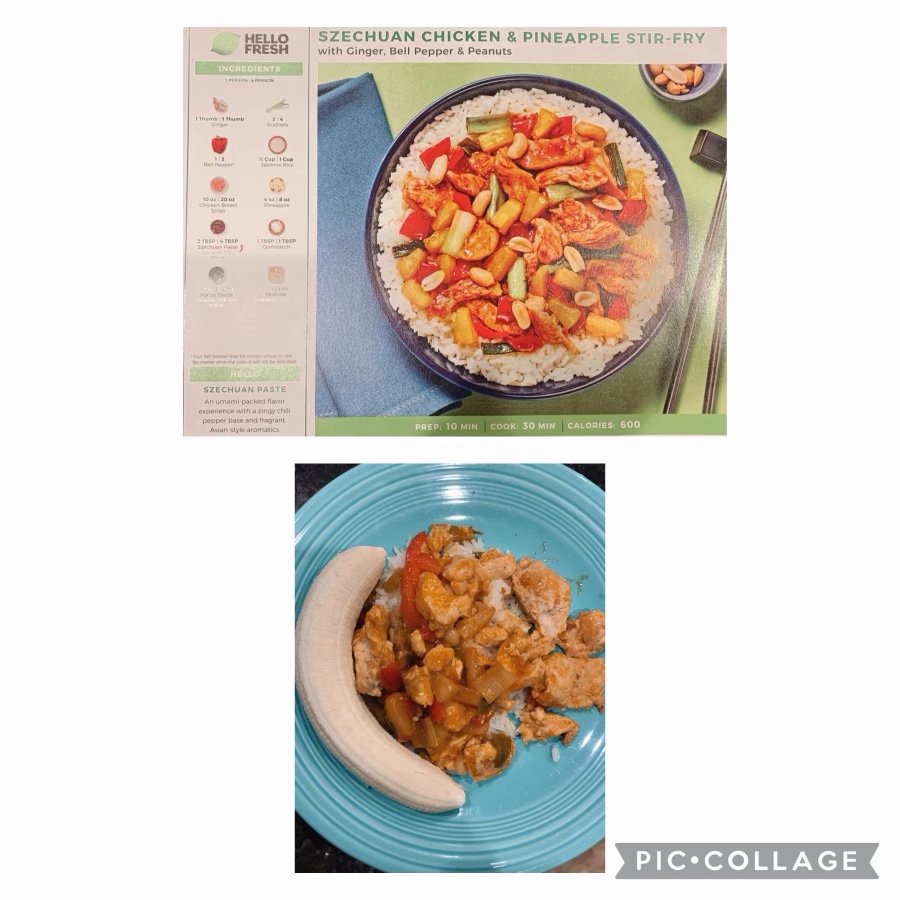
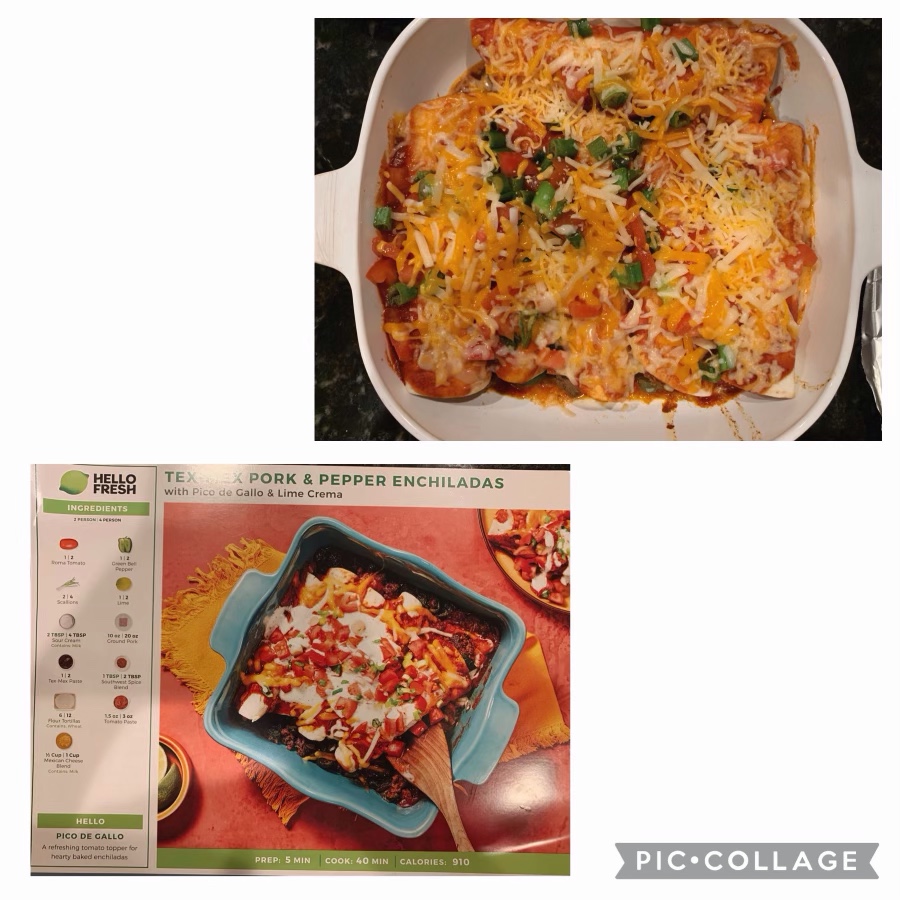
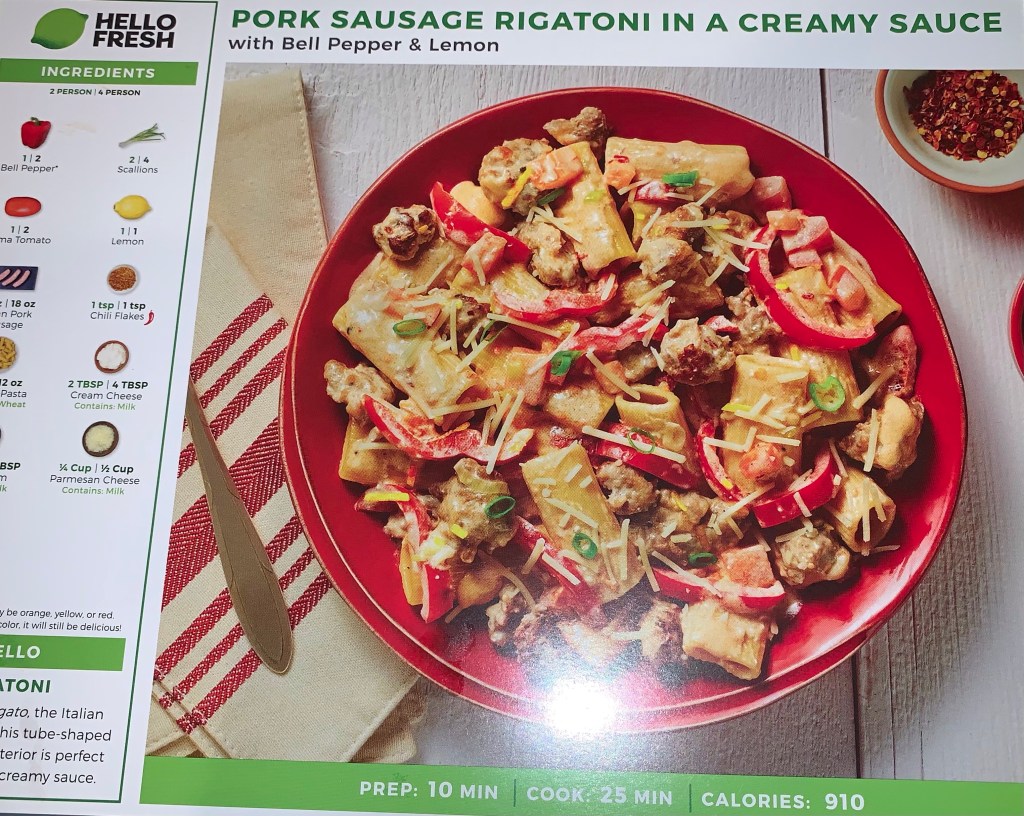
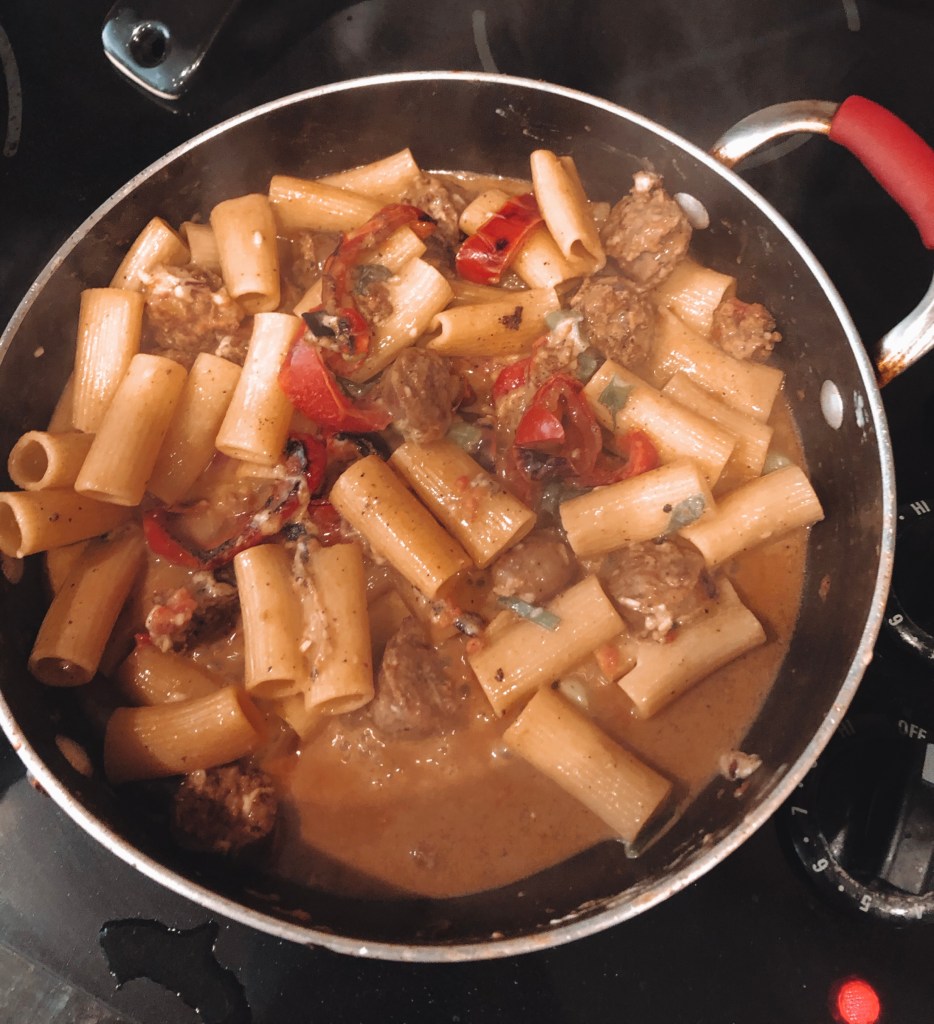
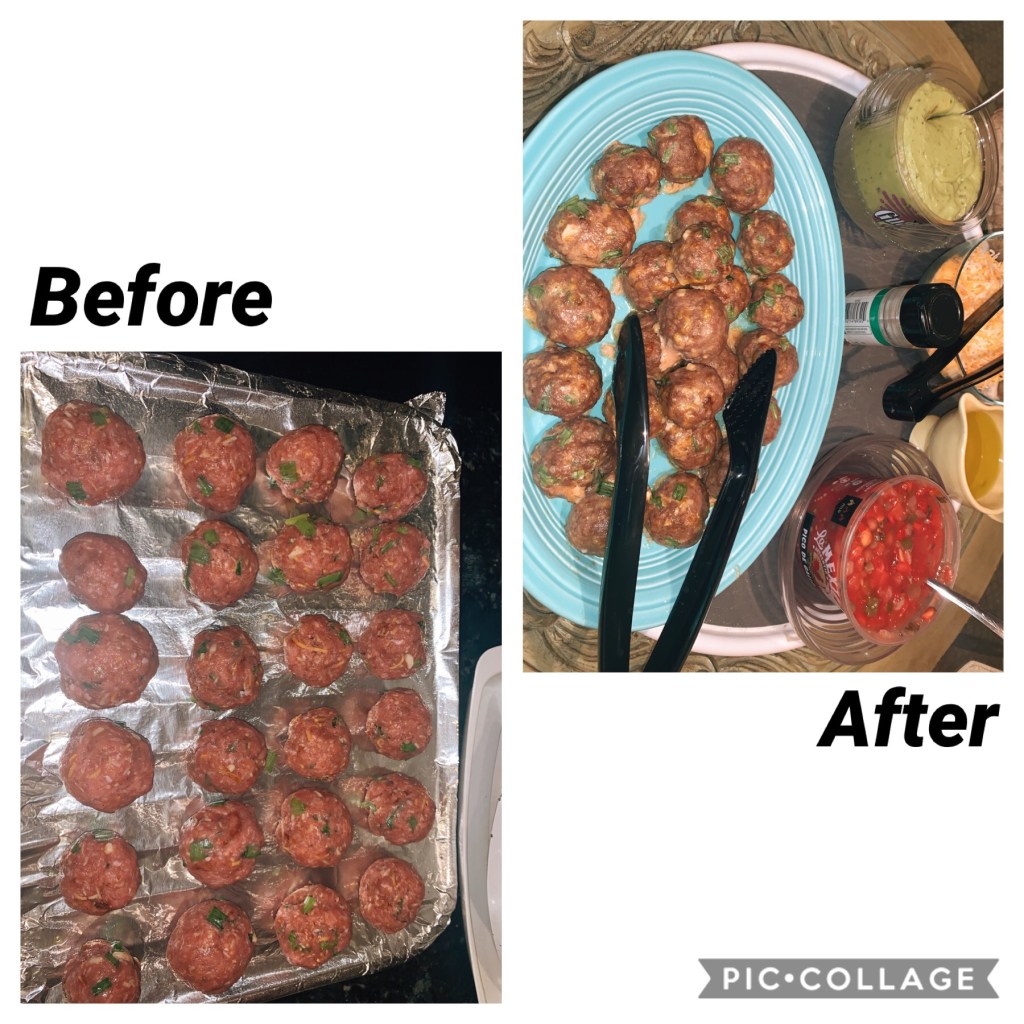
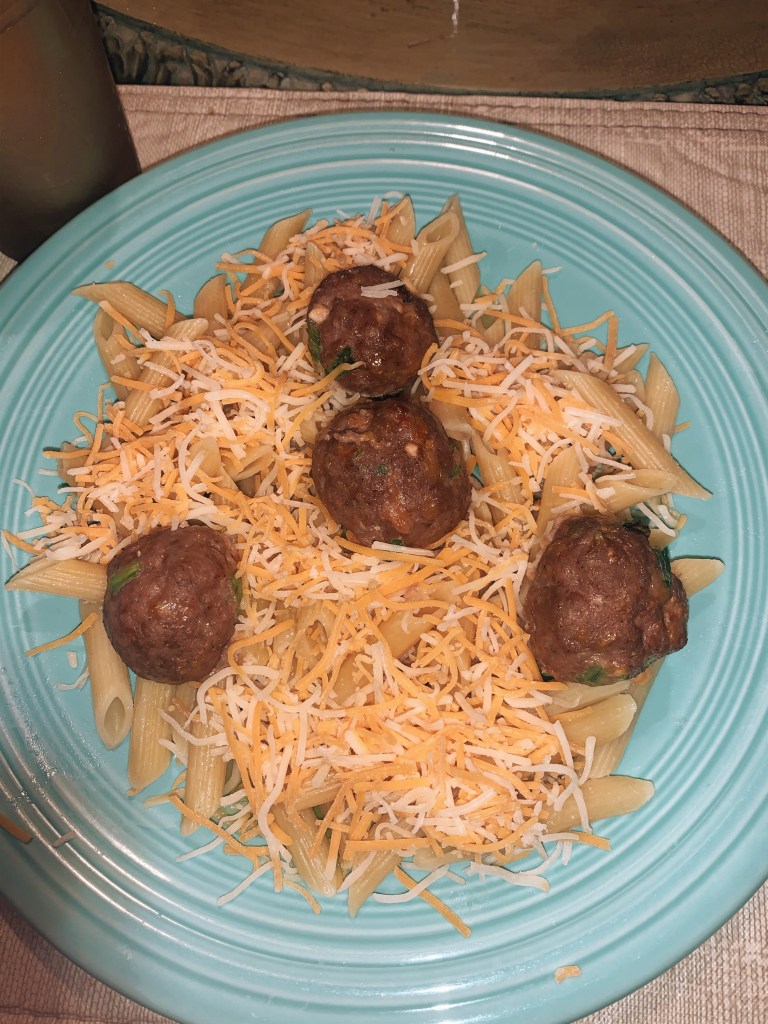
For my 3 pound project I chose cooking. The reason why I chose cooking was because I will be heading off to college very soon and I wanted to familiarize myself with some starter dishes and meals that my family and I will personally like. I also wanted to learn how to cook actual meals instead of eating out all the time so I can be a bit healthier. The meals that I learned how to cook over this quarter were Pork Sausage Rigatoni in a Creamy Sauce, Tex Mex Pork and Pepper Enchiladas, Szechuan Chicken and Pineapple Stir-fry, Chicken Sausage Cavatappi Bolognese with Zucchini and Parmesan, and Firecracker Meatballs.

By doing this project, I was able to learn more about not only my favorite meals, but my family’s as well as the skills, knowledge, and planning that goes into them. Cooking requires a lot of focus for the portion of the recipe where you need to make sure you get the right amounts established to pour into your bowl or pan. After that, it is mainly waiting, mixing, or assembling. Normally, during those times I would bring my speaker down and play music to make it more fun and to make the time go by faster. 

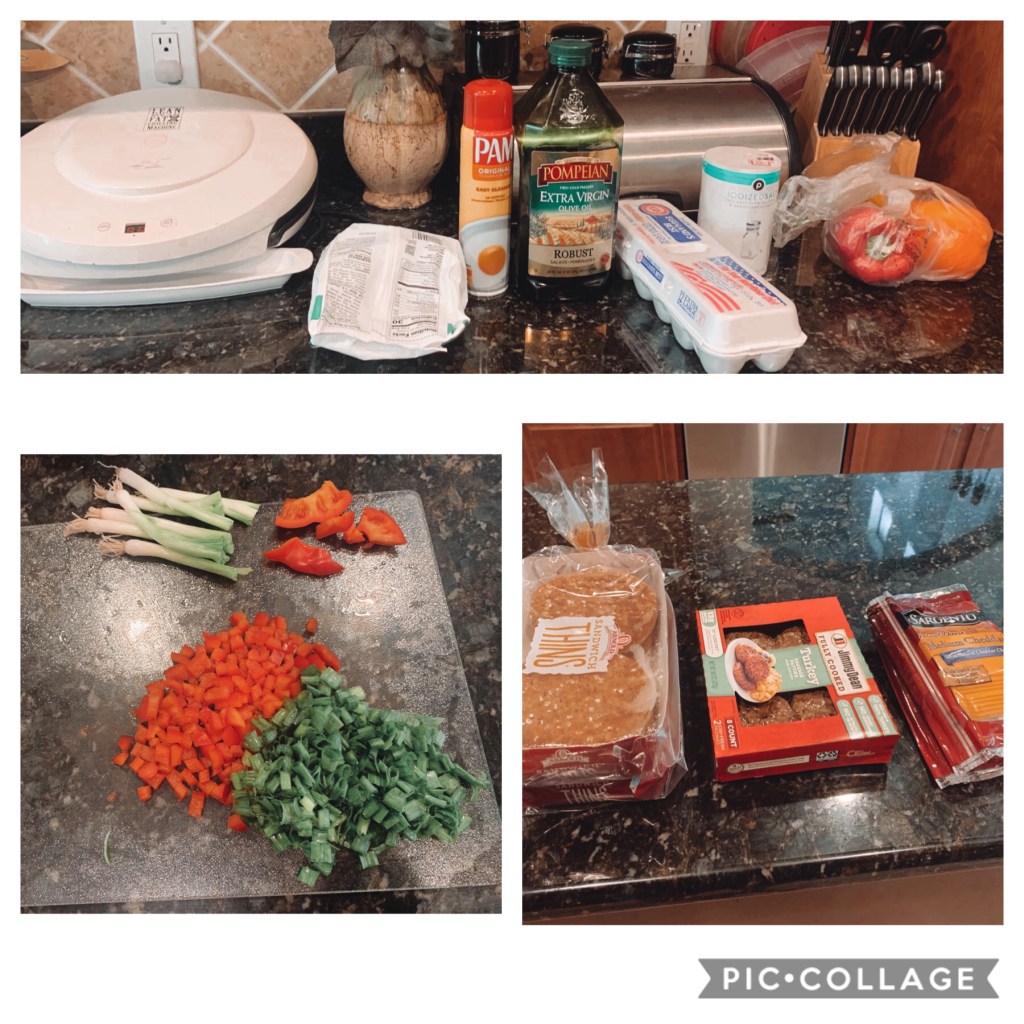
When I first started the three pound project, I split the process into two days a week so it would be convenient for myself to gather all the supplies needed on day 1 and then cook on day 2. Once I set my schedule and meals for each week, my process ran very smoothly and efficiently. However, for the second time around I chose to do it all in one blog. At first, splitting it up made it a lot easier for me to remember the recipes, supplies used, and what pans and so forth I needed, but as I got more accustomed to the cooking life I didn’t need as many reminders. 

As far as challenges with cooking, I started out not knowing a single thing besides how to make cereal and some sandwiches. I was never really involved in the kitchen prior to the project besides when I would help set up the table and clean up. Thankfully, my mom and dad are both good at cooking and they were able to show me where everything I needed was, as well as help me get a start on some of the meals. Towards the end, I became a pro and knew how to make a meal without any help. 

This project really opened my eyes as to how much thought and effort my mom and dad put for us for each meal we eat together as a family. When I cooked each meal, I watched as my family members would take a bite and I wanted to see if their reactions were good or bad. Now I know that as a cook it takes a lot of courage to make a dish and not know if someone is going to truly like it or not. In my family we used to always joke with my mom that she was a bad cook, but now I am not going to do that anymore because I bet my food doesn’t taste nearly as good as hers and as I said, I now know that it takes a lot to make food and share it with others. Being told your food doesn’t taste good will hurt because you put all of that time, ingredients, and effort into it and you were excited to hand it out and see the reactions. It has not happened to me, but I am sure it will. 

I am very proud that I took on cooking for my three pound project because I not only learned how to cook some of our favorite meals, but I was also able to bond with my parents more. It was a very nice experience and I still have a lot more to learn!

Week 5!

Hi! Welcome back to this week’s blog!

This morning (Monday, April 26th) I asked my mom to pick what she wanted me to make for dinner and she excitedly chose Firecracker Meatballs from our HelloFresh options.

The Firecracker Meatball recipe is as follows:

1. Adjust rack to top position (top and middle positions for 4 servings) and preheat oven to 425 degrees. Wash and dry all produce. Trim and thinly slice scallions, separating whites from greens; mince whites. Peel and mince ginger.

2. In a large bowl, combine mayonnaise, sour cream, honey, 2 tsp soy sauce (4 tsp for 4 servings; you’ll use the rest later), and sriracha to taste. Set aside.

3. Heat a drizzle of oil in a small pot over medium-high heat. Add half the sesame seeds (save the rest for serving); cook, stirring, until golden brown, 1-2 minutes. Add rice, ¾ cup water (1½ cups for 4 servings), and a big pinch of salt. Bring to a boil, then cover and reduce to a low simmer. Cook until rice is tender, 15-18 minutes. Keep covered off heat until ready to serve.

4. While rice cooks, in a second large bowl, combine beef, panko, ginger, scallion whites, remaining soy sauce, salt (we used ½ tsp; 1 tsp for 4 servings), and pepper. Form into 10-12 (20-24 for 4)1½-inch meatballs.

5. Place meatballs on one side of a lightly oiled baking sheet. On empty side, toss green beans with a drizzle of oil, salt, and pepper. Roast on top rack until meatballs are cooked through and green beans are browned and tender, 14-16 minutes. (For 4 servings, divide between 2 sheets; roast meatballs on middle rack and green beans on top rack.

6. Fluff rice with a fork; season with salt and pepper. Divide between bowls or plates. Carefully add meatballs to bowl with sauce; toss to coat. Top rice with meatballs and drizzle with any remaining sauce. Serve green beans to the side. Garnish with scallion greens, remaining sesame seeds, and chili flakes to taste.

This meal was probably one of my favorite! The sauce for the meatballs tasted amazing and made the meal complete. I will most likely be using this sauce from now on! It was also so nice to eat green beans again, I always enjoy adding them on the side. The rice of course was a good touch as well although, I am not a huge fan of rice as much anymore. I also added a banana, which gave more sweet flavor! Overall, I would give this meal a 9/10! I would love to make it again!

Here is a picture of my result as well as the HelloFresh guide!

Week 4!

Hi everybody! Welcome to week 4 of cooking!

This week I had my brother pick which dish and he chose Chicken Sausage Cavatappi Bolognese with Zucchini and Parmesan. He was excited to finally have a dish that included Zucchini! He also loves sausage as it not only tastes good, but adds good protein.

This meal took about 5 minutes to prep and 30 minutes total to make. It was very simple, which I always love. What I loved the most was how fast it took to make because I had to leave right away for practice. Therefore, after I finished making dinner I put my portion in a to go container and ate it on the way! It tasted amazing and gave me a perfect amount of carbs and protein to have a good workout! Overall I would give it a 10/10.

The recipe is:

1. Adjust rack to top position and preheat oven to 450 degrees. Bring a large pot of salted water to a boil. Wash and dry produce. • Trim and halve zucchini lengthwise; cut crosswise into ½-inch-thick half-moons. Halve, peel, and thinly slice onion.

2. Toss zucchini on a baking sheet with a drizzle of oil, half the Italian Seasoning (you’ll use the rest later), and a pinch of salt and pepper. • Roast on top rack, tossing halfway through, until browned and tender, 14-16 minutes. • Tent with foil to keep warm.

3. Once water is boiling, add cavatappi to pot. Cook until al dente, 9-11 minutes. • Reserve 1½ cups pasta cooking water (2 cups for 4 servings), then drain.

4. While pasta cooks, heat a drizzle of oil in a large pan over medium-high heat. Add onion and a pinch of salt and pepper. Cook, stirring occasionally, until softened, 5-6 minutes. • Add sausage* and cook, breaking up meat into pieces, until browned, 3-4 minutes (it’ll finish cooking in the next step).

5. Add tomato paste and remaining Italian Seasoning to pan. Cook, stirring constantly, until fragrant, 1 minute. • Stir in stock concentrate, 1 cup reserved pasta cooking water (1½ cups for 4 servings), and a big pinch of salt and pepper. Bring to a simmer; cook until sauce is slightly thickened and sausage is cooked through, 2-3 minutes. • Reduce heat under pan to medium low.

6. Stir drained cavatappi, zucchini, sour cream, and 1 TBSP butter (2 TBSP for 4 servings) into pan until thoroughly combined. TIP: If needed, stir in more reserved cooking water a splash at a time until pasta is coated in sauce. • Divide pasta between bowls. Sprinkle with Parmesan and serve.

Here is a picture of my result as well as HelloFresh’s

Week 3 :)

Welcome to week 3 of my cooking!

This week, on April 15th I let my mom pick what she wanted me to make. She chose the Szechuan Chicken and Pineapple Stir-fry. She loves vegetables and spicy sauces so I had a feeling she was going to pick this one! Unfortunately, I cannot handle spicy sauces or foods, such as the peppers I had to use in this meal, but it was still a very quick and easy process.

The recipe is as follows:

1. Wash and dry all produce. • Peel and mince or grate ginger. Trim and cut scallions crosswise into 1-inchthick pieces. Core, deseed, and dice bell pepper into ½-inch pieces.

2. Melt 1 TBSP butter (2 TBSP for 4 servings) in a small pot over medium-high heat. Add half the ginger; cook, stirring, until fragrant, 1 minute. • Stir in rice, ¾ cup water (1¼ cups for 4), and a pinch of salt. Bring to a boil, then cover and reduce to a low simmer. Cook until rice is tender, 15-18 minutes. • Keep covered off heat until ready to serve.

3. While rice cooks, pat chicken* dry with paper towels. • Heat a drizzle of oil in a large pan over medium-high heat. Add chicken and cook, stirring occasionally, until browned and cooked through, 4-6 minutes. • Turn off heat; transfer chicken to a plate. Wipe out pan.

4. Drain pineapple, reserving juice in a small bowl. • Heat another drizzle of oil in pan used for chicken over medium-high heat. Add pineapple, scallions, bell pepper, and remaining ginger; cook, stirring, until softened, 4-6 minutes. TIP: If ginger and scallion whites begin to brown too quickly, reduce heat to medium low. • Meanwhile, whisk half the cornstarch (all for 4 servings) into bowl with reserved pineapple juice.

5. Stir cooked chicken into pan with veggie mixture. Stir in Szechuan paste, pineapple juice mixture, ponzu, ¼ cup water (1⁄3 cup for 4 servings), and ½ tsp sugar (1 tsp for 4). Cook, stirring frequently, until sauce has slightly thickened and everything is thoroughly coated, 2-3 minutes. Taste and season with salt and pepper. • Turn off heat.

6. Fluff rice with a fork and season with salt. • Divide rice between bowls; top with chicken stir-fry and peanuts. Serve.

The picture above is a sheet that HelloFresh provided me with for you all to see what it should look like and the picture below is my result!

Overall, this meal was easy to make and my whole family really enjoyed it. I, on the other hand, did not enjoy it as much only due to the vegetables, peppers, and peanuts. The mixture was not the best for my tastebuds, but I am glad that everyone else liked it. I would most likely not make this again, but maybe someone else would! I give it a 6/10.

Week 2!

Yesterday, April 7th, I cooked Tex Mex Pork and Pepper Enchiladas from HelloFresh for my mom and brother. I set up all of my ingredients in the kitchen before my brother and I went to the gym. Once we got home, I immediately began cooking because we were all starving. The amazing thing about these meals is that they are very quick and easy to make. This recipe only took me about 40 minutes total not including setting up or cleaning, but it wasn’t too much to set up and clean anyway considering the company gives you the exact amount of each ingredient in plastic bags. Therefore, you can throw away the packets as soon as you use them.

1. Adjust rack to top position and preheat oven to 475 degrees. Wash and dry all produce. • Dice tomato. Core, deseed, and dice poblano. Trim and thinly slice scallions. Quarter lime.

2. In a small bowl, combine tomato, scallions, a drizzle of oil, and juice from 1 lime wedge (2 wedges for 4 servings). Season with salt and pepper. • In a separate small bowl, combine sour cream with lime juice to taste. Add water 1 tsp at a time until mixture reaches a drizzling consistency. Season with salt and pepper.

3. Heat a drizzle of oil in a large pan over medium-high heat. Add poblano, salt, and pepper; cook until just softened, 3-4 minutes. Transfer to a third small bowl. • Add another drizzle of oil to same pan. Add beef*, half the Tex-Mex paste, half the Southwest Spice (you’ll use the rest of each later), salt, and pepper. Cook, breaking up meat into pieces, until browned and cooked through, 4-6 minutes. TIP: If there’s excess grease in your pan, carefully pour it out. • Return poblano to pan; stir to combine. Turn off heat.

4. Place a small amount of filling on one half of each tortilla. Roll up tortillas, starting with filled sides, to create enchiladas. Place seam sides down in an 8-by-8-inch baking dish (9-by-13inch dish for 4 servings) or an ovenproof pan.

5. In a bowl or liquid measuring cup, combine tomato paste, remaining Tex-Mex paste and Southwest Spice, and ½ cup water (¾ cup for 4 servings). • Pour over enchiladas to thoroughly coat. Sprinkle with Mexican cheese. • Bake on top rack until sauce is bubbly and cheese has melted, 3-5 minutes

6. Top enchiladas with lime crema and pico de gallo. Divide between plates and serve with any remaining lime wedges on the side.

Here is a picture of the recipe paper the company provides you with and a picture of my final result! It tasted very good, I would definitely give this meal a 10/10 and I would cook it again.

Welcome back! Week 1

Good Evening everyone and welcome back to my healthy cooking blog!

As I have said in my previous blog posts, my family and I love pasta dishes and I have been able to find certain recipes that make it healthier! We can’t not eat pasta! So of course, I started my cooking off with Pork Sausage Rigatoni in a Creamy Sauce.

Last quarter I used Elena Osipov’s healthy recipes to guide my meals, but this time I am going to use HelloFresh! My mom and I have been really focusing and eating well balanced meals. HelloFresh is exactly the place to start. HelloFresh is a meal kit delivery service that offers weekly shipments of recipes and groceries that allow you to make easy and appealing meals at home. It’s not only very convenient for our timing and spending, but its healthy! You get to choose which meals you want to make each week and they send you everything in order to make that dish as well as the calorie counts and so forth. Every meal for the most part includes good protein and vegetables. I have never eaten as many vegetables as I have since I started with HelloFresh, the sauces and tips they give you make everything so much better!

The recipe for Pork Sausage Rigatoni in a Creamy Sauce is:

1. Bring a large pot of salted water to a boil. Wash and dry all produce. • Halve, core, and thinly slice bell pepper into strips. Trim and thinly slice scallions, separating whites from greens. Dice tomato into ½-inch pieces. Zest and quarter lemon. • Remove sausage* from casing; discard casing.

2. Heat a drizzle of olive oil in a large pan over medium-high heat. Add bell pepper and scallion whites; cook, stirring, until slightly softened, 3-4 minutes. Season with salt and pepper.

3. Add sausage to pan; cook, breaking up meat into pieces, until browned and cooked through, 4-6 minutes. • Season with salt and pepper. If you like things spicy, stir in a pinch of chili flakes and cook until fragrant, 15 seconds. TIP: If there’s excess grease in your pan, carefully pour it out.

4. Once water is boiling, add rigatoni to pot. Cook until al dente, 9-11 minutes. • Reserve ½ cup pasta cooking water, then drain.

5. Add tomato to pan with sausage mixture and cook until softened, 1-2 minutes. Reduce heat to medium low. • Stir in cream cheese, sour cream, half the Parmesan (save the rest for serving), ¼ cup reserved pasta cooking water, and 1 TBSP butter until thoroughly combined. (For 4 servings, use 1⁄3 cup reserved pasta cooking water and 2 TBSP butter.) • Season with salt, pepper, and lemon zest to taste. Add drained rigatoni and toss to coat. TIP: If needed, stir in more reserved pasta cooking water a splash at a time until pasta is coated in a creamy sauce.

6. Divide pasta between bowls. Sprinkle with scallion greens, remaining Parmesan, and a pinch of chili flakes if desired. Serve with lemon wedges on the side.

Here is an example of how the recipes come in the package. They are very easy and nice to follow with the steps on the back listed very clearly along with pictures!
Here is a picture of when I was cooking!

Overall, I loved making this meal because it was quick, easy, and tasted very good! It was a 10/10 in my book.

Back to cooking! Quarter 4 Reflection

For my 3# project, I decided to learn how to cook healthy foods. Eating healthy foods has not been a big part of my routine or diet and cooking sure is not a skill of mine, but that just made it more of a reason to be my new challenge. I wanted to learn how to cook healthy foods in order to benefit me in the future.

I was able to google certain healthy food recipes and I also asked my mom for assistance on how to get started and where to find the specific ingredients as well as learning how to use the certain tools. I looked up certain videos as soon as I learned how to use all the tools and began to do things on my own while following the recipes I chose from online.

For this new quarter I plan on repeating some of the dishes I learned in order to make sure I got it down the first time. It is important to practice the meals over again so that I can do it fully on my own for more to come. I would also like to add more simple and faster dishes to make, as I am always on the go especially during these final months and volleyball season!

My greatest challenge coming up this quarter will be how frequent I will not be home. I am worried that I will not be home as much as I thought in order to make the foods I have chosen, but I am hopeful that I can find some time in between school and volleyball. In order to make time I will set a date and time one day each week just for cooking.

Furthermore, by doing this project in the first quarter I was able to learn more about my favorite meals and the skills, knowledge, and planning that goes into them. Cooking requires a lot of focus for the portion of the recipe where you need to make sure you get the right amounts established to pour into your bowl or pan. After that, it is mainly waiting, mixing, or assembling. Normally during those times I bring my speaker down and play music to make it more fun and to make the time go by faster.

This project really opened my eyes as to how much thought and effort my mom and dad put for us for each meal we eat together as a family. When I cooked each meal, I watched as my family members would take a bite and I wanted to see if their reactions were good or bad. Now I know that as a cook it takes a lot of courage to make a dish and not know if someone is going to truly like it or not. In my family we used to always joke with my mom that she was a bad cook, but now I am not going to do that anymore because I bet my food doesn’t taste nearly as good as hers and as I said, I now know that it takes a lot to make food and share it with others. Being told your food doesn’t taste good will hurt because you put all of that time, ingredients, and effort into it and you were excited to hand it out and see the reactions. It has not happened to me, but I am sure it will.

Overall, I am really looking forward to continuing this project in order to get more practice for my future. Cooking is a challenging skill for me, but I cannot wait to strengthen it more and more when I can! Prepare to see new on the go dishes and some possible repeated dishes that I will attempt to do from memory!

Week 4, Day 2 of Cooking!!

Hey fellow cookers and welcome back to see my results on my Breakfast Sandwiches!

Here is a picture of how it turned out and a little bit of the process before putting the eggs inside the buns!

In this recipe, Olena Osipov included peppers to add to the flavor. My dad and mom both love peppers, so of course they loved the whole sandwich, but since I really despise the taste of peppers I did not like the sandwich as a whole as much. I loved the sandwich itself and the taste, but as I ate it I would pick out the peppers as I saw them. Without the peppers, I would give this sandwich an 8/10. It was still very good and super easy to make. It did take a little longer than the past meals I have tried, but my dad and I made the wait fun as I brought my speaker down and played our favorite songs on full volume. It was a good day on October 7th because it was also my senior night and I was already excited when I woke up, then on top of that I made my favorite meal of the day, breakfast! It is a very nice snack or quick thing to eat when you are hungry in the morning. It is not a whole meal, but it did fill me up after eating one! We also had veggies in there of course, so it made me feel better about going on in my day.

We had extra sandwiches when we finished cleaning up and eating. Therefore, I will be eating this sandwich for breakfast for a little bit longer and I am completely fine with that!

Week 4, Day 1 of Healthy Cooking

Hi guys and welcome back to my blog!

This week we will be changing things up a bit by making Breakfast Sandwiches! I am very excited for this week because I specifically love breakfast, it is my favorite meal of the day and I always prefer it to be almost perfect for me to have a good day. I would not mind making a breakfast dish like this at anytime of the day because as I not only love breakfast time, but the breakfast food the best! I would prefer eggs or pancakes over lasagna anyday!

I will continue to use Olena Osipov’s recipes. For this Breakfast Sandwich I will gather the ingredients as follow:

  • 12 large eggs
  • 4 cooked chicken sausages, diced
  • 1 large onion, chopped
  • 1 bell pepper, finely chopped
  • 5 large kale leaves, rib removed and chopped (baby spinach works too)
  • 1 tbsp avocado or olive oil
  • 1/4 cup milk or water
  • 1 tsp baking powder
  • 12 whole wheat burger thin buns, English muffins or bagels
  • 12 slices of real cheese
  • Salt
  • Cooking spray
Here is a picture of a majority of the ingredients I gathered!

I am specifically excited for this week because not only is it breakfast in general, but I feel as if cooking breakfast is more fun! For breakfast you can mix multiple things and add fruits and such, instead of just having one set dish as you would for a dinner.

Stay tuned for my results and feedback on the meal! I will also let you know if it was completely different or felt different than cooking dinner!

Week 3, day 2 of healthy cooking :)

Welcome back to see the results of my Mexican Meatballs and Pasta!

I followed Olena Osipov’s recipe as follows:

  1. Preheat oven to 375 degrees F. Line large baking sheet with unbleached parchment paper and spray with cooking spray.*
  2. In a large mixing bowl, add turkey, cheese, green onions, garlic, chili powder, cumin, paprika, salt, pepper and mix well using your hands. Form into 30 golf ball size meatballs (I use small ice cream scoop).
  3. Bake meatballs in 2 batches for 15 minutes or until browned. Serve hot with guacamole and pick de gallo. Or serve as an appy.

Overall, this dish was super easy and fast to make as you can tell by the recipe! I definitely recommend trying it out, as it also tasted amazing!

One thing that was quite funny to me when making this dish was when I had to put all of the ingredients in a bowl with the ground turkey, which was really cold, along with all of the other ingredients to mix it and my dad looked at me and said “Welcome to real cooking.” When you are trying out different meals you will have to get your hands dirty in some kind of way, whether if it’s during the actual cooking, with the actual meal or cleaning up. I was not prepared to stick my hand in the bowl, but after a while of mixing, I felt like a professional. At first I complained, but now I know what has to be done to make something delicious! I am ready to get my hands dirty when cooking, but always remember to wash your hands!!!

It is also amazing to see how far along I am coming. Before all of this, I never even wanted to try cooking because I thought it was going to be a nightmare, but now I have learned little things like the courage to put my hands in a messy bowl of food or grab something quickly out of the burning hot oven, which I never wanted to get near before. It is a great feeling to have, especially the feeling of responsibility because cooking is something adults do and now I feel as if I am growing up because of my new skills.

Here is a picture of the meatballs before I put them in the oven for a little bit longer than 15 minutes because I made mine a little thicker than Olena Osipov did when making hers and after when they were completely done 🙂
And here is my plate with pasta and cheese!

Come back next week for Ground Turkey and Broccoli pasta as my family also requested I learn one more dish with pasta before I move on!

Design a site like this with WordPress.com
Get started